I see many articles with photography tips from experts. Most are filled with sensible advice, but when I used to read those articles, I’d think, “Well, they are professionals. I bet I can’t follow these tips effectively.”
In addition, as my main—only—subject is my children, some advice was too generic for what I was trying to do. As you delve deeper into photography forums, you’ll also feel the inherent bias against the “moms with SLRs.” Amateur photographers really hate the moms with SLRs. A fancy digital camera is the new minivan, it seems.
So here we have a niche. Moms with cameras who just want to take great pictures of their kids, but who want to learn and grow in photography along the way. A momtographer, if you’re a fan of portmanteaus (I am not).
I’m not an expert. Nor a professional. Any photographer with a good eye can see my errors in lighting, or where I am out of focus. But I love this hobby, and I love to share. I want everyone to take great pictures of their kids! So from one parent to another, one amateur to someone just beginning, here are my top tips for photographing children.
1. Keep Taking Pictures
The first step is to take pictures. And then take more pictures.
Your camera doesn’t matter. Use a camera phone, a point and shoot, a bridge camera, a DSLR. It doesn’t matter, at least not at first. A good camera does not a good photographer make.
Does gear matter eventually? Absolutely. But you won’t know what you need, or know how to use the resources you have, until you have a feel for composition, subject, lighting, and your own personal style. Some of my favorite photos were taken on my little Canon digital ELPH point and shoot.
One day, you will think, “Wow, I like this photo, but it will be better if I could separate the subject from the background a bit. Wow, I wish I could get this photo a bit sharper. Wow, I really like photos that are close-cropped, but I can’t zoom in that far.” Then you decide what you need to accomplish that.
This picture was taken with a Canon ELPH point and shoot. Notice the background is skewed. Notice I used the classic beginner’s trick of black and white to create drama. But this is the photo that made me realize I wanted to upgrade to a DSLR.
2. Composition Basics
Get down to the subject’s level. Try not to shoot from above. I also like to get as close in (whether that’s using zoom lens, or walking in close using a fixed lens) as I can. You want to create an intimacy with the subject. Since your subject is three feet tall, become three feet tall as well.


I like filling the frame with my subject. I want to focus here on my birthday girl, not the funky warehouse-district setting. The setting still exists as a neat backdrop in the other photo from this session, but not in such a way that it draws the eyes
The “Rule of Thirds” is a great basic tenet of photography (divide your photo into a three-by-three grid and place your subject on one of the intersecting lines). This rule isn’t as applicable to basic kid photography, although it’s still very nice for portraiture in general.
3. Posing
Candid shots are better than posed shots. Let your kids do their thing. You might ask them to head over to that beautiful grouping of flowers, but please don’t tell them how to pose. My favorite photos are of the unscripted moments.
4. Lighting
Pay attention to light. Let me count the ways.
- Avoid your on-camera flash. Sometimes you may need to use the flash if the subject is extremely backlit and you need to “fill in” with light so you can see the subject, but until you really know how to use artificial lighting, it generally should be off-limits.
- Natural light is the best for now. If you are taking an indoor portrait, position your subject 45 degrees from where the window is. Let the light illuminate the child’s face softly and from the side. With proper lighting, you can reflect a glow in your child’s eye and capture catchlights.

- Enjoy “Golden Hour,” the time just before sunset when the sun is low on the horizon and the light is soft and red. My favorite is October-February in late afternoon. Especially during Golden Hour, don’t be too afraid of backlighting or lens flare. It can have a great effect and set the mood appropriately. (If you have an SLR and want to avoid lens flare at any time, buy a lens hood).
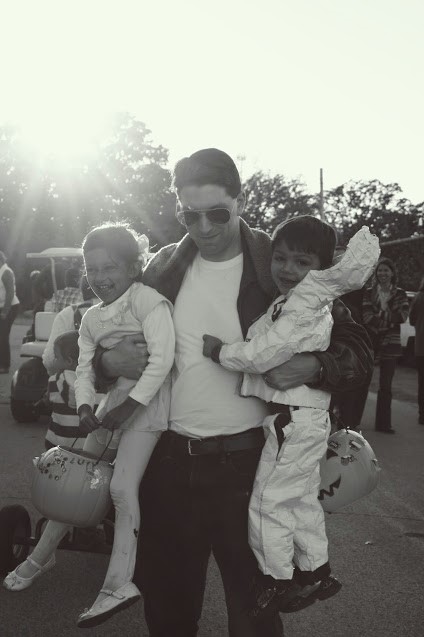

These pictures are from different years, both taken at the beautiful Camp Loughridge in Oklahoma, during Golden Hour in October.
- Once you’re ready to learn how to use flash effectively, head on over to Strobist.com and up your game.
5. The Golden Triad
Try to use the right setting for the right situation. This is the main beef of experts who grouse that amateurs only use the auto setting on their fancy new SLRs. This scares a new photographer. Must they use manual mode? How would they learn how to use manual mode?
It’s not all or nothing. Yes, you should learn about the golden triad: ISO, aperture, and shutter speed. My favorite book to get up to speed is “Understanding Exposure,” by Bryan Peterson.
If you have an SLR, yes, by all means, play around with manual mode to get a feel for the concept. But look: You’re taking pictures of fast-moving children. You don’t have time to fiddle with your settings. That’s where the creative modes come in (on a DSLR, or on a bridge camera like the Sony Cybershot).
Aperture Priority: This is my favorite setting for children. What is aperture? Think of the diameter of the opening in your camera lens. The higher the aperture (ex: f/22), the smaller that opening. That results in a picture in which the entire field of view is in focus. I like to shoot at the widest aperture (lowest number, such as f/3.5 or f/1.8) available. Shooting at a wide aperture causes that beautiful blurred background (called bokeh).
I shot this picture with a Canon 50mm while “wide open” at the maximum aperture of f/1.8. I needed to use that aperture to make the lights in the background create that neat “bubble” effect. But experienced people will realize her eyes are out of focus, a likely consequence of shooting at that aperture. This will drive them crazy. As her mom, though, I love this picture.
Shutter Speed Priority: When aperture priority doesn’t work because the kids are moving too much and causing blurry shots, shutter speed priority is good, too. I often have to remind myself to switch to that. What is shutter speed? Basically, just how fast the shutter on the camera closes. If it opens and closes quickly, it captures the picture in a short period of time, so a droplet of water is captured in a single moment. A longer shutter speed means the shutter is open longer, which allows in more light but will make something in motion blur, so you’ll get a picture of flowing water.
ISO: Don’t be afraid to bump up the ISO, even if the shot is grainy. It’s better to get a grainy shot than no shot at all. What is ISO? Think of it as the number of worker bees slaving to create your picture. The more worker bees, the more likely you’ll actually get a picture, but it’ll be noisy and grainy because of all the bees involved.
Other settings: You can still choose settings with a point and shoot camera, and even with your phone.
If you want a wide aperture (blurry background), shoot in portrait mode.
If you want everything in the field of view to be in focus, shoot in landscape.
If you want a fast shutter speed, shoot in sport mode.
You can download camera apps for your phone that will let you change shutter speed and even aperture in some cases. The one I use for my Nexus 5 is called “Manual Camera.”
6. Focal Length
Focal length is basically how far your lens extends with respect to the image sensor in your camera. But why can’t you just take a picture and crop it?
Interestingly enough, the distance from which the picture is taken affects perspective quite a bit. So it is better to go ahead and already have the correct focal length for your subject. 35mm (like what most of us used with film cameras) is considered closest to what your eye sees. For portrait photography, a focal length of 85mm-105 mm is considered ideal. If you’re a beginner, your DSLR likely is a “crop sensor” camera, which means the actual focal length is a bit different than what is stated. So a 50mm lens on a crop sensor camera (like mine) is roughly equivalent to 75mm.
You can use a zoom lens, such as the kit lens that came with your camera, to achieve the correct focal length. My kit lens was a 18mm-55mm lens. However, basic zoom lenses sacrifice sharpness and aperture. I use a prime lens (one with fixed focal length) with my kids: a 50mm that has a maximum aperture of f/1.8. If you have a Canon camera, you can get one of those for the absurdly cheap price of $100.
7. Focusing
I mentioned that I often shoot at the widest aperture available. That is, indeed, one of the top mistakes new photographers make. No, you don’t always have to have the most blurry backgrounds. It gets clichéd after a while. Also, you often sacrifice sharpness, and will have more trouble getting everything you need in focus.
The best way to focus a portrait is to focus on the subject’s nearest eye. You can use autofocus points or get your single point center focus on the eye by half-pressing the shutter then recomposing to get the shot you want. Another way to do this is to reassign another button as the focus button, so you don’t confuse the camera by using your shutter button. This often is called “back-button focus” and I use it, although it makes it darn near impossible for someone else to use my camera.
8. Editing
This is the fun part for me! So much photography magic occurs in post-processing. In fact, Ansel Adams was well known for his pioneering work in the darkroom. Whatever built-in editing tool you have in your phone or your computer is sufficient for the basics: straightening your picture (avoid those skewed backgrounds unless it’s a deliberate artistic choice!), cropping, even adding filters (ex: the “Instagram look”).
But let’s talk on an intermediate level: even better programs out there will let you apply changes to little specific parts of your photos—sharpen them a bit, eliminate some of the noise, and change some of your exposure settings. My favorite for the phone is Snapseed, and my favorite for the computer is the Nik collection. Both are made by the same company, now owned by Google. The Nik collection, unfortunately, is hard to use as a standalone program, but it’s well worth looking into it and playing around.

Taken on an iPhone, edited in Snapseed.
Now, let’s move on to the advanced level, which is taking your pictures as a RAW file instead of a JPG. What is RAW? Think of it as the digital equivalent of a “negative.” Normally, when you take a picture, your camera automatically converts it into a JPG and makes decisions on white balance and color curves. Taking your picture in RAW eliminates the camera’s decision-making process. When you then open up the RAW file, the pictures look flat and off.
The benefit, however, is that the camera has recorded all the information it can about the photo, unlike when it pre-made it into a JPG. So you have greater control in editing that photo, sharpening it, changing the exposure, changing the white balance. You can change your camera settings to shoot only in RAW or RAW plus JPG (so you have both options). I even shoot RAW+JPG on my camera phone, using my app.
I won’t delve into any more detail, as this is an advanced process. But if you want the software to process those photos, I’d recommend either Lightroom (the industry standard) or a free program such as Darktable or Rawtherapee (which is what I use).


It’s amazing how much control you can have over color and timbre when editing a RAW photo.
9. Sharing
This is short and simple. Share only your best photos. Sometimes you find value in sharing that grainy cell phone photo on Facebook—I certainly do—but when sharing an entire album, try to keep only the best. Not only does that make your entire album look more cohesive, but it showcases your style and forces you to think critically about what makes a good photo.
10. Storage
I have a friend who just broke her iPhone. She lost her pictures.
People. Cloud backup. Please. I have redundancies built in all over. Our photos (whether on a computer or phone) go immediately into a shared Dropbox account. They also go immediately into Google Photos. I use Amazon Cloud to back up my RAW files. And I have an external hard drive, which I mirror with another external hard drive. I also regularly upload to Shutterfly and Facebook. Yeah, it’s overkill, but I don’t worry too much about losing my photos!
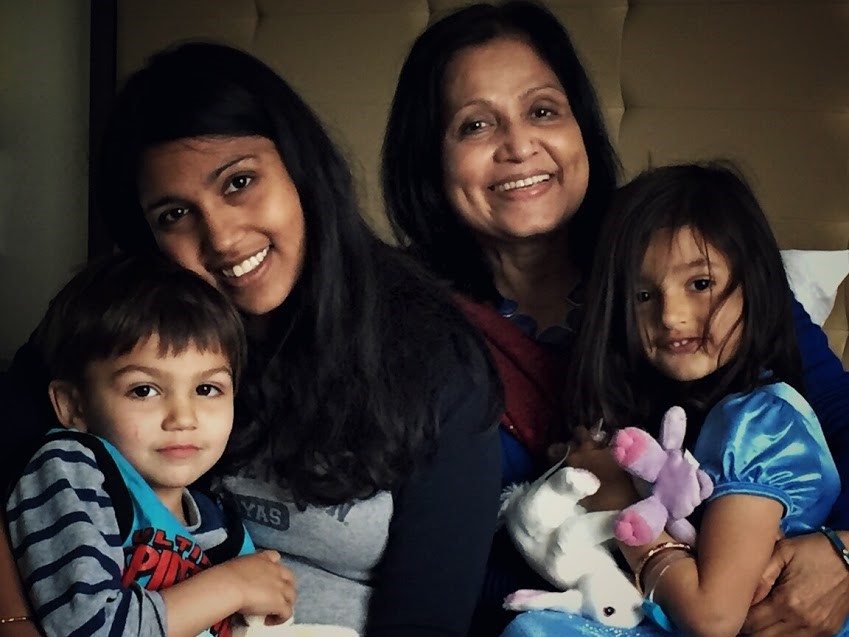
Keeping originals, if you have the space, is also helpful. Back when I was in my over-editing phase, I vignetted this photo of my son too much. I would kill to have the original so I can fix the damage.
It’s still a sweet picture, isn’t it? You’re not trying to capture technically perfect photos. You’re not trying to get paid for your photography or be in an art exhibit. I certainly wouldn’t display all my photos here as examples of professional work. They’re not. But they are pictures that make me feel something and capture the emotion I have for my children. And that’s kinda the whole point.